 Home
HomeHow to create an OpenVPN connection on ChaletOS
:: Forum :: How-tos and Tutorials
Page 1 of 1

How to create an OpenVPN connection on ChaletOS
![]() by BroDan Wed Oct 14, 2015 11:10 am
by BroDan Wed Oct 14, 2015 11:10 am
If you would like an added measure of safety and privacy on your computer, a VPN is a wise choice. OpenVPN is one of the most secure ways to do this. To add OpenVPN to your system, follow these steps...this is a little lengthy, but I've tried to make it as simple and easy to follow as possible.
1. Go to the following website to get your free OpenVPN account. Don't worry, you don't have to give any information!
http://www.vpnbook.com/
When the website opens, click on the Free VPN tab at the top of the page. That will bring up the following page seen below. All you need to do is click on one of the bundles in the right column (under the Free OpenVPN heading). I chose the US1 OpenVPN Certificate Bundle. Also, the username and password are shown at the bottom of the list. Write them down, because you will need them later!

2. Create a new Folder to extract the downloaded bundle into your File Manager.
I created my new folder in Home and named it VPN. If you're unsure how to create a new folder, simply right-click on an empty space of your file manager, and click Create Folder, enter any name you want to call the folder, and click Create.
3. Now find your downloaded bundle in your Downloads folder.
Right-click the zip file and open with Archive Manager.
Click Extract
In the window that pops up, navigate to the new folder you just created. Then click Extract at the bottom of the window.
4. Go to the folder that you created in your file manager. There should be files in the folder now.
5. Create 3 empty text files in the new folder.
This is done by right-clicking an empty space in the folder. Hover your pointer over Create Document and click on Empty File.
- Name the first one ca.crt and click Create.
- Name the second one certificate.crt and click Create.
- Name the third one key.key and click Create.
6. Open one of the .ovpn folders. There are 4 to choose from; to make this easier, 2 of them have tcp in their file name; therefore, choose one of those (I chose the one that has tcp443 in the file name).
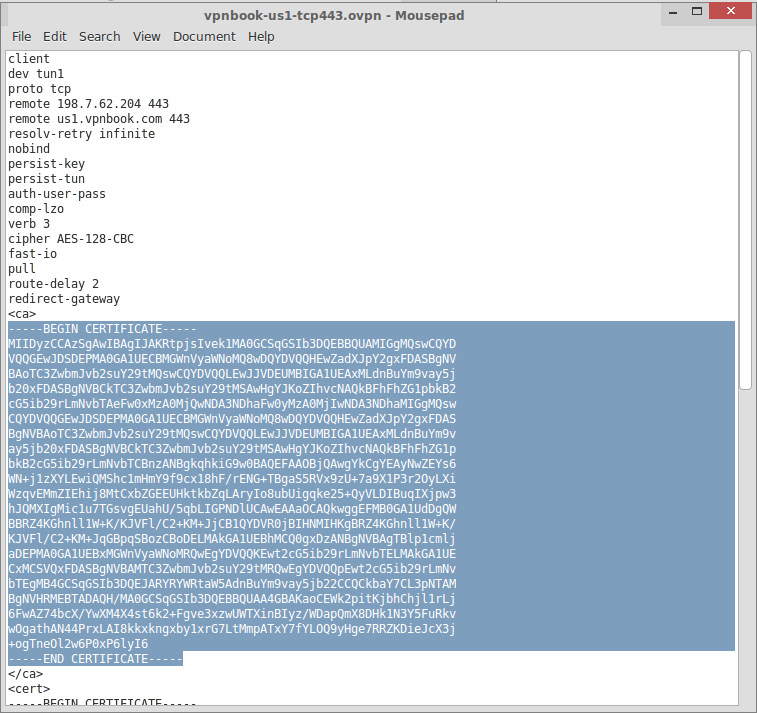
- Copy all of the text between the <ca> </ca> tags and paste it into ca.crt file. You will have to copy the text first, then right click on the ca.crt file and choose Open with Mousepad. If the Open with Mousepad option isn't showing, you will have to choose Open with Other Application. In the window that pops up, scroll down until you find Mousepad. Click it, and click Open.
- Copy all of the text between the <cert> </cert> tags and paste into certificate.crt file.
- Copy all of the text between the <key> </key> tags and paste into key.key file.
Here's an example of what you would copy for the ca.crt file...everything that's highlighted in blue.
Okay...the hard part is over now!
7. Open your terminal and enter (or copy and paste) the following command...
sudo apt-get install network-manager-openvpn
8. Click the Network icon on your panel.
- Hover your pointer over VPN Connections
- Click Configure VPN
- In the window that pops up, click Add
- In the window that pops up, choose OpenVPN from the drop-down list.
- Click Create
9. The editing window for your VPN will pop up. Fill in the following information...
- Connection name: leave it as is or name it what you'd like.
- Gateway: enter the IP address found in the .ovpn file you used.
When you open the .ovpn file you used, it will be the fourth line down. For example, the fourth line will read something like this...remote 198.7.62.204 443
Just copy and paste the numbers (including periods) for the Gateway...don't include the word remote or the numbers that follow those nine numbers.
- Type: Password with Certificates (TLS)
- Username: enter the username given from the website...I hope you wrote it down!
- Password: enter the password given from the website...
- User Certificate: choose the certificate.crt file.
- CA Certificate: choose the ca.crt file.
- Private Certificate: choose the key.key file.
- Private Key Password: leave it empty.
10. Click on Advanced...
Part of this will depend on which .ovpn file you used. I used the vpnbook-us1-tcp443.ovpn file. Notice the number 443 in the file name...
In the Advanced window, fill in and put check marks in the following...
- Use custom gateway port: 443 (443 was in my .ovpn file name. Use 80 if you chose the file with tcp80.)
- Use LZO data compression
- Use a TCP connection (notice tcp in the file name)
Click the Security tab, and fill in the following...
- Cipher: AES-128-CBC
Click OK
Click Save
Now, if everything went right, you're ready to connect to your VPN...
11. Click the Network icon on your panel.
- Hover your pointer over VPN Connections.
- Your VPN should show up by whatever name you gave it...click on it.
It may take a few moments, but if the connection is established, you will get a pop-up notification...

Enjoy your VPN!
1. Go to the following website to get your free OpenVPN account. Don't worry, you don't have to give any information!
http://www.vpnbook.com/
When the website opens, click on the Free VPN tab at the top of the page. That will bring up the following page seen below. All you need to do is click on one of the bundles in the right column (under the Free OpenVPN heading). I chose the US1 OpenVPN Certificate Bundle. Also, the username and password are shown at the bottom of the list. Write them down, because you will need them later!
2. Create a new Folder to extract the downloaded bundle into your File Manager.
I created my new folder in Home and named it VPN. If you're unsure how to create a new folder, simply right-click on an empty space of your file manager, and click Create Folder, enter any name you want to call the folder, and click Create.
3. Now find your downloaded bundle in your Downloads folder.
Right-click the zip file and open with Archive Manager.
Click Extract
In the window that pops up, navigate to the new folder you just created. Then click Extract at the bottom of the window.
4. Go to the folder that you created in your file manager. There should be files in the folder now.
5. Create 3 empty text files in the new folder.
This is done by right-clicking an empty space in the folder. Hover your pointer over Create Document and click on Empty File.
- Name the first one ca.crt and click Create.
- Name the second one certificate.crt and click Create.
- Name the third one key.key and click Create.
6. Open one of the .ovpn folders. There are 4 to choose from; to make this easier, 2 of them have tcp in their file name; therefore, choose one of those (I chose the one that has tcp443 in the file name).
- Copy all of the text between the <ca> </ca> tags and paste it into ca.crt file. You will have to copy the text first, then right click on the ca.crt file and choose Open with Mousepad. If the Open with Mousepad option isn't showing, you will have to choose Open with Other Application. In the window that pops up, scroll down until you find Mousepad. Click it, and click Open.
- Copy all of the text between the <cert> </cert> tags and paste into certificate.crt file.
- Copy all of the text between the <key> </key> tags and paste into key.key file.
Here's an example of what you would copy for the ca.crt file...everything that's highlighted in blue.
Okay...the hard part is over now!
7. Open your terminal and enter (or copy and paste) the following command...
sudo apt-get install network-manager-openvpn
8. Click the Network icon on your panel.
- Hover your pointer over VPN Connections
- Click Configure VPN
- In the window that pops up, click Add
- In the window that pops up, choose OpenVPN from the drop-down list.
- Click Create
9. The editing window for your VPN will pop up. Fill in the following information...
- Connection name: leave it as is or name it what you'd like.
- Gateway: enter the IP address found in the .ovpn file you used.
When you open the .ovpn file you used, it will be the fourth line down. For example, the fourth line will read something like this...remote 198.7.62.204 443
Just copy and paste the numbers (including periods) for the Gateway...don't include the word remote or the numbers that follow those nine numbers.
- Type: Password with Certificates (TLS)
- Username: enter the username given from the website...I hope you wrote it down!
- Password: enter the password given from the website...
- User Certificate: choose the certificate.crt file.
- CA Certificate: choose the ca.crt file.
- Private Certificate: choose the key.key file.
- Private Key Password: leave it empty.
10. Click on Advanced...
Part of this will depend on which .ovpn file you used. I used the vpnbook-us1-tcp443.ovpn file. Notice the number 443 in the file name...
In the Advanced window, fill in and put check marks in the following...
- Use custom gateway port: 443 (443 was in my .ovpn file name. Use 80 if you chose the file with tcp80.)
- Use LZO data compression
- Use a TCP connection (notice tcp in the file name)
Click the Security tab, and fill in the following...
- Cipher: AES-128-CBC
Click OK
Click Save
Now, if everything went right, you're ready to connect to your VPN...
11. Click the Network icon on your panel.
- Hover your pointer over VPN Connections.
- Your VPN should show up by whatever name you gave it...click on it.
It may take a few moments, but if the connection is established, you will get a pop-up notification...
Enjoy your VPN!
Last edited by BroDan on Tue Oct 27, 2015 12:50 pm; edited 3 times in total

BroDan- Posts : 86
Join date : 2015-05-07
rusty likes this post
Re: How to create an OpenVPN connection on ChaletOS
![]() by BroDan Mon Oct 19, 2015 3:53 am
by BroDan Mon Oct 19, 2015 3:53 am
I also use this on my Android. Installation instructions can be found HERE.
BroDan- Posts : 86
Join date : 2015-05-07
» "How to create a bootable USB stick on Windows"
» Change automount create dir prefix?
» Bluetooth Connection
» Keep loosing wifi connection
» [Solved] No Broadcom wireless connection on Acer Aspire 9410Z laptop
» Change automount create dir prefix?
» Bluetooth Connection
» Keep loosing wifi connection
» [Solved] No Broadcom wireless connection on Acer Aspire 9410Z laptop
:: Forum :: How-tos and Tutorials
Page 1 of 1
Permissions in this forum:
You cannot reply to topics in this forum|
|
|